Preparing Your Bike for Paint
Preparation is key when you want to know how to repaint a bike. Start by gathering all the necessary tools and materials. It ensures a smoother painting process. A well-prepared bike results in a more professional finish.
Choosing the Right Workspace
Select a clean, well-ventilated area for painting your bike. Avoid dusty or windy locations to prevent particles from sticking to the wet paint. Good lighting is also essential to help you spot any imperfections during the process.
Dismantling the Bike
Begin by removing all detachable parts from your bicycle. These include the wheels, seat, and handlebars. This step makes it easier to paint every part of the bike frame evenly. It also protects non-paint areas from accidental spray or brush marks.
Cleaning and Sanding the Frame
Thoroughly clean the bike frame to remove any dirt, grease, or old paint. Use a degreaser for stubborn spots. After cleaning, sand the frame to create a smooth surface for primer application. Using medium-grit sandpaper typically works well. Ensuring the frame is smooth is crucial for optimal painting results.
Selecting the Right Paint
Choosing the right type of paint for your bike ensures durability and aesthetics. It forms the foundation of a successful repaint project. Therefore, selecting the optimal paint is crucial.
Types of Bike Paint
There are various types of paint available specifically for bikes. Each type offers different benefits:
- Epoxy Paints: Known for their durability and resistance to chipping and chemicals.
- Acrylic Paints: Quick drying and available in a wide variety of colors. Great for achieving a glossy finish.
- Powder Coats: Provide a thicker, more durable layer, resistant to scratches and weather influences.
Selecting Colors and Finishes
The color and finish of your bike paint can transform its appearance. Here are some tips on choosing the right ones:
- Color Matching: Try to match or complement the original color for a classic look.
- Vibrant Colors: Bright colors make your bike stand out and look unique.
- Matte vs. Glossy: Matte finishes are modern and trendy, while glossy finishes provide a shiny, classic look.
The outcome of your project will greatly depend on these choices. Make sure to test paint samples if possible to see how they look in different lights.
Applying Primer
Before diving into the vivid world of colors, it’s essential to lay down a primer. The primer serves as a preparatory coat that helps the paint adhere better and last longer. The role it plays cannot be overstated; it forms a protective barrier between the metal frame and the paint, which can prevent rust and improve the paint’s durability.
Importance of Primer
Primer is crucial because it provides a smooth, even surface which ensures that the paint will stick to the bike frame effectively. It also helps to cover any imperfections or remaining blemishes on the metal, providing a seamless base for your color of choice. A primed surface will hold the paint well and resist peeling or cracking over time, making all your efforts in learning how to repaint a bike worthwhile.
How to Apply Primer Evenly
Applying primer evenly is key to achieving professional-looking results. Here are some simple steps:
- Shake or Stir: Ensure that the primer is well-mixed for consistency.
- Spray or Brush: Depending on your preference for spray painting or brush painting, apply a thin coat of primer. Be consistent with the thickness.
- Overlapping Strokes: Use long, even, overlapping strokes to ensure coverage without heavy buildup.
- Allow Drying: Wait for the primer to dry completely before applying the next layer.
- Light Sanding: Once dry, lightly sand the surface again to ensure ultimate smoothness.
- Clean Dust: Wipe away any settled dust from sanding before applying paint.
Remember to take your time with each coat of primer to prevent drips and uneven spots. Be sure to cover all areas of the frame for uniform protection. Following these steps will set the stage for a stunning and durable finish on your repainted bike.
Painting Techniques
Choosing the right painting technique is crucial for a flawless finish on your bike.
Spray Painting vs. Brush Painting
When deciding how to repaint a bike, you’ll need to choose between spray painting and brush painting. Each method has its own advantages.
Spray Painting: This method is quicker and offers a more uniform coat. It’s ideal for covering large surfaces evenly. However, it requires more ventilation and can be messy.
Brush Painting: Offers more control and is better for detailed work. It’s less wasteful and doesn’t require special equipment like spray painting does. The downside is, it may leave brush strokes if not done carefully.
Applying Multiple Coats
Applying multiple coats of paint ensures durability and a rich color finish. Here are steps to follow:
- Apply the First Coat: Start with a thin layer, letting it fully dry as directed.
- Sand Lightly: Once dry, lightly sand the surface for a smoother second coat.
- Apply the Second Coat: Apply the second coat, ensuring even coverage.
- Check for Missed Spots: Inspect the bike for any uneven areas or missed spots.
- Additional Coats: If needed, apply a third coat following the same steps.
Multiple coats help protect against scratches and weather. They also make your bike look great for years. Remember, the key to a successful paint job is patience and attention to each layer.
Adding Details and Decals
Once you have your bike painted, it’s time to add personality. Details and decals can turn a plain bike into a masterpiece.
Creating Custom Designs
You can create custom designs to make your bike unique. Here’s how:
- Sketch First: Draw your design on paper. This helps you plan the look.
- Tape for Guides: Use painters tape to outline your design on the bike.
- Paint Pens: For intricate details, use paint pens. They offer precision.
- Stencils: Use stencils for consistent shapes. They make applying designs easier.
Take your time when adding designs. Patience brings out the best results.
Applying Decals and Protectants
Decals are another way to personalize your bike. Applying them is straightforward:
- Clean Surface: Ensure the area is clean before applying decals.
- Position Carefully: Place decals where you want them. Make sure they’re straight.
- Smooth Out: Use a credit card to smooth out bubbles under the decal.
After decals, protect your bike with a clear coat. It seals the paint and decals. A good clear coat also helps guard against scratches and UV rays.
- Apply Evenly: Spray the clear coat evenly across all painted surfaces.
- Dry Fully: Let the clear coat dry as the product instructs.
Adding these final touches is crucial. They bring your bike’s new look to life and ensure its longevity. So, add details to make your bike stand out and protect it to maintain its look.
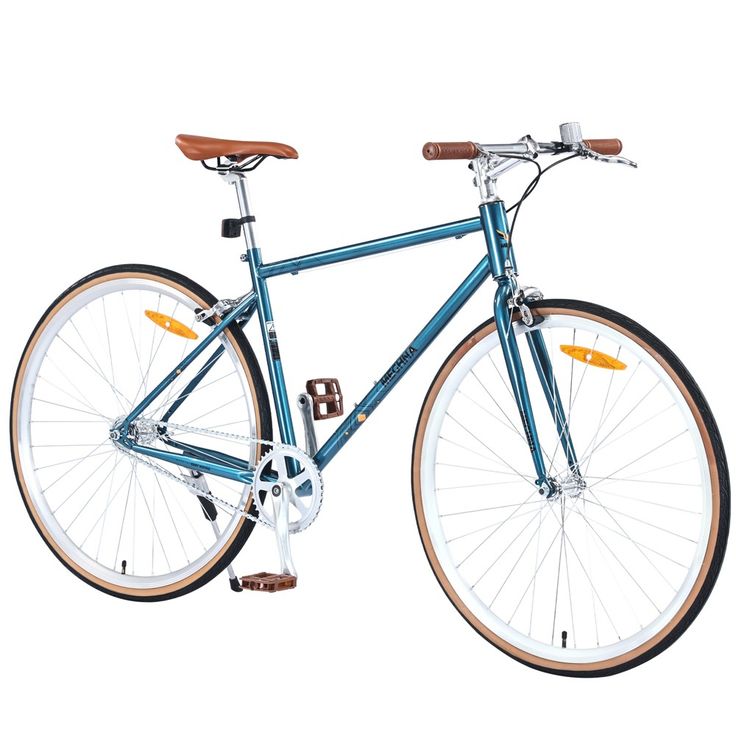
Reassembling the Bike
After adding the details and decals, the next step in how to repaint a bike is reassembling it. This phase is as crucial as the initial dismantling because it affects the bike’s functionality. Take great care to ensure every component fits back correctly.
Reattaching Components Carefully
Begin by aligning each part back to its original position. Attach the wheels first, followed by the handlebars, and then the seat. Use the correct tools to avoid damaging the fresh paint. Secure components with the right amount of torque to prevent them from becoming loose during rides.
- Wheels: Check the alignment and tighten the bolts.
- Handlebars: Ensure they are straight and secure.
- Seat: Adjust to the proper height and lock it in place.
Ensuring Everything is Secured
Once all parts are in place, double-check every bolt and screw. Make sure they are tight and the bike parts are stable. Test the brakes and gears for smooth operation. Confirm that no part wobbles or has play in it. Look over the bike one last time to ensure everything is as it should be.
- Test Brakes: Squeeze them to check for solid engagement.
- Check Gears: Shift through them to ensure smooth transitions.
- Final Look: Inspect the bike for any issues or overlooked details.
Reassembling is the final step to complete the repainting process. Be thorough and precise. This ensures your bike not only looks fantastic but is also safe to ride. Remember, a well-assembled bike delivers the best performance and extends the life of your new paint job.
