
Hydraulic bike brakes offer exceptional stopping power and modulation. However, over time, air can seep into the brake lines, causing reduced performance. This article will guide you through the essential steps to effectively bleed your hydraulic bike brakes. A well-maintained brake system ensures safety and reliability during rides. Therefore, it’s crucial to understand the bleeding process. Utilizing this guide, you will enhance your maintenance skills and keep your brakes functioning optimally.
Understanding Hydraulic Brake Systems
What Are Hydraulic Brakes?
Hydraulic brakes rely on fluid to transfer force from the lever to the caliper. This design allows for a more consistent and powerful braking experience. Unlike mechanical brakes, hydraulic systems use brake fluid. This fluid compresses easily, creating smoother braking action. As a result, riders often prefer hydraulic brakes for their reliability and efficiency.
Moreover, hydraulic brakes require careful maintenance. Contaminated or low fluid levels can lead to performance issues. Regular checks can prevent problems from arising. Knowing the basics of your brake system helps ensure informed maintenance decisions. Additionally, understanding how hydraulic brakes operate aids in recognizing signs of potential issues.
Why Do You Need to Bleed Brakes?
Over time, air can enter the brake lines. This intrusion can lead to a spongy feel when pulling the brake lever. If this occurs, bleeding the brakes is necessary. Air bubbles reduce hydraulic pressure, resulting in decreased stopping power. Bleeding removes trapped air, restoring brake performance.
Bleeding your brakes also helps maintain optimal brake fluid levels. Old fluid can degrade over time and lose its effectiveness. Thus, regular bleeding can improve brake reliability. Furthermore, addressing air in the lines enhances your overall riding experience. Failing to bleed hydraulic brakes can create unsafe conditions during rides.
Preparing to Bleed Your Hydraulic Brakes
Gather Necessary Tools
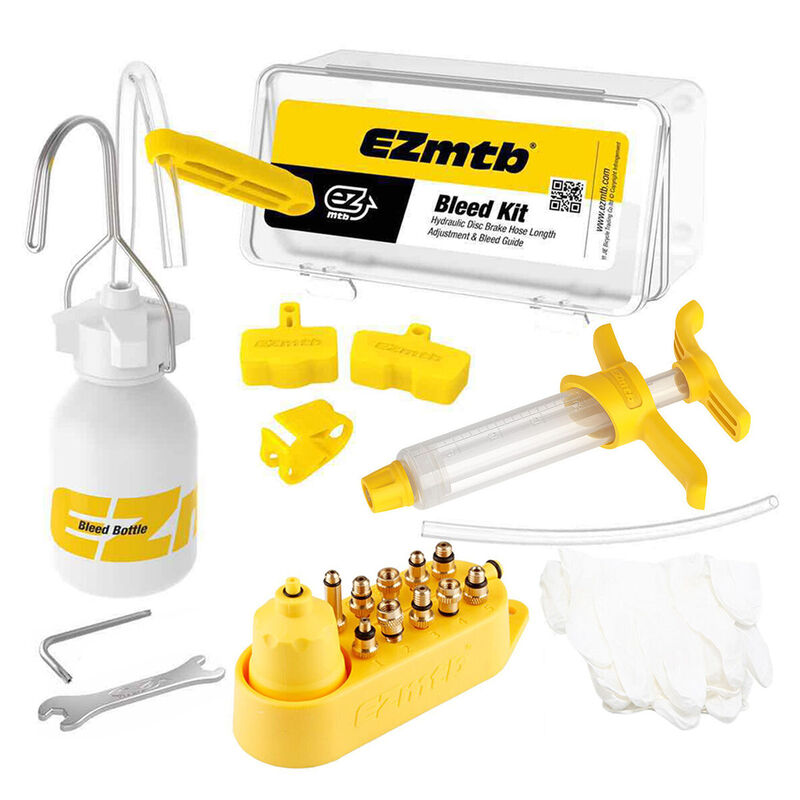
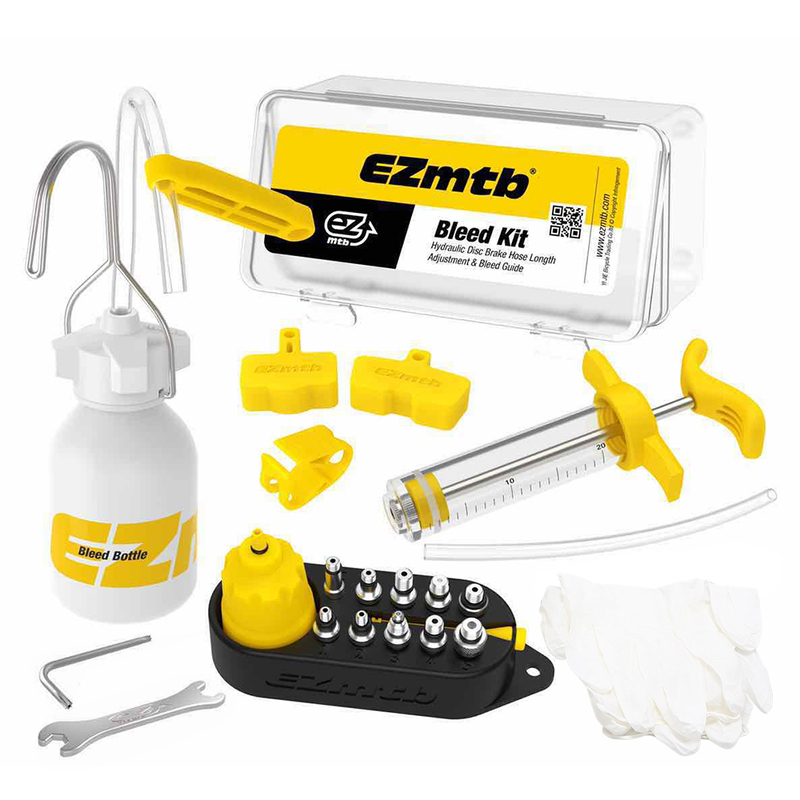
Before starting, gather all necessary tools and materials. You will need a bleed kit specifically designed for your brake brand. Most kits include syringes, tubes, and bleed screws. Additionally, have new brake fluid ready for the bleeding process. It’s vital to use the correct type of fluid compatible with your brakes.
To protect your bike and yourself, use a padded surface. This setup helps prevent scratches and damage. You might also want to wear safety goggles and gloves. Brake fluid can be corrosive, so protecting your skin and eyes is essential. Moreover, a clean work area prevents contamination of your brake fluid.
Prepare Your Bike
Ensure your bike is in a stable position before starting. Use a bike stand or flip the bike upside down for convenience. However, flipping the bike can cause fluid spillage, so be cautious. Moreover, remove the wheel if necessary for better access to the brake components.
Next, inspect your brake components. Check for any visible leaks or damage. Addressing physical issues before bleeding is crucial for safety. If you find any problems, consider replacing damaged parts first. Moreover, it’s wise to have a friend nearby to assist if needed. Working with someone can make the process smoother and safer.
The Bleeding Process
Step 1: Remove Brake Pads
Begin by removing the brake pads carefully. They can obstruct access to the bleed screws. To do this, consult your bike’s manual for specific instructions. Properly follow the removal process to avoid misplacing any components. Keeping the brake pads in a safe spot will prevent losing them.
After removing the pads, inspect them for wear. If they are worn down, consider replacing them to maintain optimal braking performance. This step is important because old pads can lead to decreased braking efficiency. Ensuring your pads are in good condition contributes to overall safety.
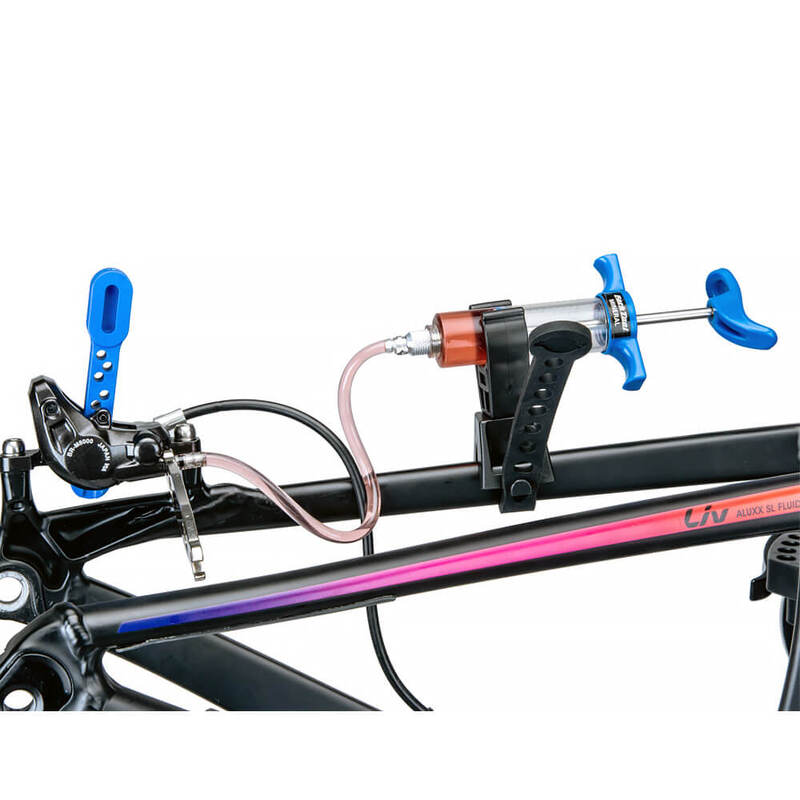
Step 2: Prepare the Bleed Kit
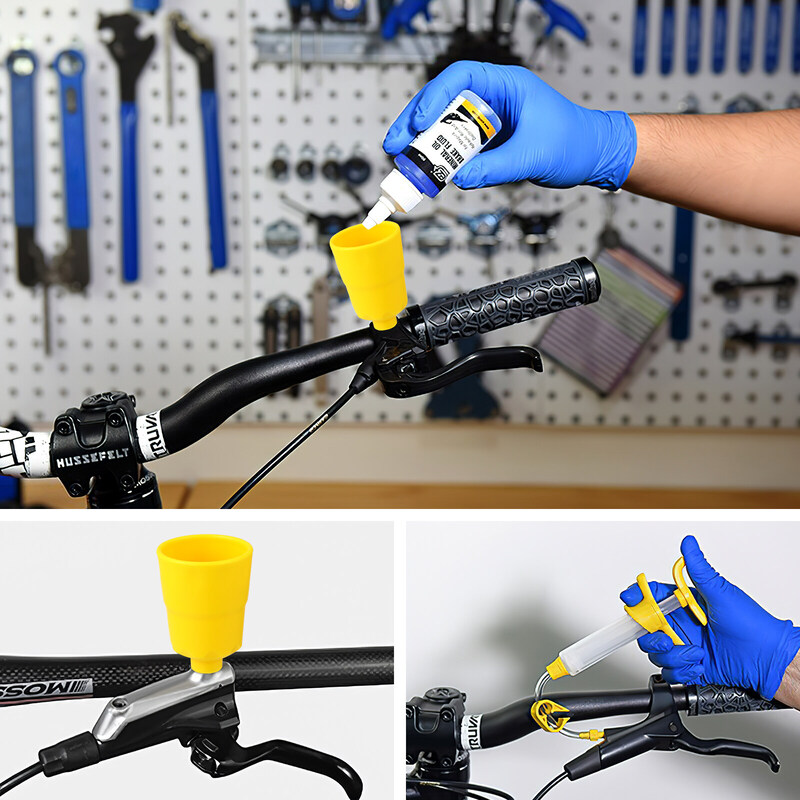
Once the pads are removed, it’s time to prepare your bleed kit. Follow the manufacturer’s instructions for assembling the syringes and tubes. Proper assembly is crucial for an efficient bleeding process. Ensure all connections are tight to minimize the risk of fluid leaks.
Next, draw some brake fluid into the syringe. Avoid pulling too much fluid, as you only need enough to complete the process. Additionally, leave some space in the syringe to avoid a mess. Preparing your bleed kit makes the bleeding process easier and more effective.
Step 3: Open the Bleed Screw
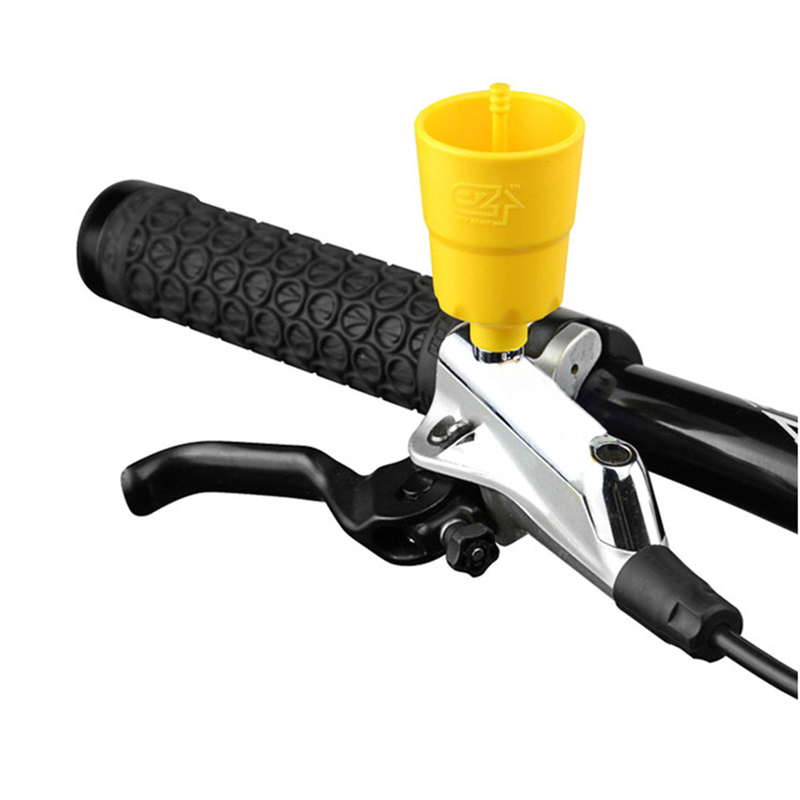
Locate the bleed screw on your brake caliper. This screw is usually near the brake line attachment. Gently loosen the screw using the appropriate tool. Be careful not to completely remove the screw, as this could lead to more complications.
Once the screw is slightly loosened, attach the tubing from the syringe to the bleed screw. Ensure the connection is tight to prevent any fluid loss. Additionally, have a container ready to catch any fluid that may spill. This preparation helps maintain a clean workspace during the process.
Executing the Bleeding Procedure
Step 4: Pump the Brake Lever
Now that the setup is complete, proceed to pump the brake lever. Slowly squeeze the lever several times to create pressure in the system. Generally, three to five squeezes are sufficient. Each pump helps push fluid through the lines, aiding in dislodging any trapped air.
As you pump, watch for air bubbles traveling into the syringe. This visual feedback indicates that air is being expelled from the system. If you notice bubbles, it means the process is working effectively. Continue this pumping action until no further air bubbles appear.
Step 5: Close the Bleed Screw
Once you no longer see air bubbles, it is time to close the bleed screw. Carefully tighten it, ensuring it is secure but not overly tight. Proper closure prevents any fluid leakage, which could lead to further issues. Always double-check your work before proceeding.
After closing the screw, give the brake lever one final pump. This step helps restore any necessary pressure and closes the system effectively. You should feel a firmer brake lever pull after performing this action. This improved feel indicates your bleeding process was successful.
Final Steps and Reassembly
Step 6: Remove the Syringe
After closing the bleed screw, it’s time to remove the syringe. Carefully detach the tubing from the bleed screw. Be cautious to avoid any brake fluid spillage during this step. Immediately dispose of or cap the syringe to prevent leaks and contamination.
Once the syringe is removed, double-check that the bleed screw is secure. Ensuring everything is tight prevents future leakage. A well-sealed system is vital for optimal brake performance. Moreover, this attention to detail ensures your safety while riding.
Step 7: Reinstall Brake Pads and Wheel
Next, reinstall the brake pads that you previously removed. Properly align them within the caliper before securing them in place. Ensure the pads are firmly positioned to avoid any issues during braking. Once complete, double-check that all components are correctly placed.
Following this, reattach the wheel to the bike. Make sure to tighten any necessary bolts and components securely. A properly mounted wheel is essential for safe riding. Furthermore, it helps ensure that your brakes function optimally during use.
Step 8: Test Ride
Once everything is reassembled, it’s time for a test ride. Gradually check the brakes to ensure they are functioning correctly. Start with light braking, paying attention to the feel of the lever. A firm lever indicates successful bleeding and optimal performance.
As you ride, test the brakes in various conditions. This testing will help ensure reliability under different circumstances. If you feel any sponginess or performance issues, consider bleeding the brakes again. Ultimately, your safety should always be a priority.
Maintenance Tips
Regular Inspection
Regularly inspecting your hydraulic brakes is vital for maintaining performance. Look for any visible signs of wear or damage. Additionally, check the brake fluid level and its condition. Clean or replace any components as needed to ensure effective operation.
Make it a habit to check the system before long rides. This practice helps identify potential issues early. Moreover, it promotes a safe riding experience, allowing for quick repairs if necessary. Regular maintenance not only improves performance but extends the lifespan of your break systems.
Fluid Replacement Schedule
Establishing a fluid replacement schedule is another key maintenance tip. Depending on riding conditions, you may need to replace fluid periodically. In general, replacing fluid every one to two years is advisable. However, if you ride frequently, consider shortening the interval.
Using old or degraded fluid can result in decreased performance. New fluid enhances the responsiveness of your brakes. Moreover, it helps prevent moisture buildup in the system, which can lead to corrosion. Being proactive with fluid replacement ensures optimal performance over time.
Conclusion
Bleeding hydraulic bike brakes is essential for maintaining performance. By following these steps, you can effectively remove trapped air from your brake system. Understanding the process empowers you to keep your brakes operating optimally. Ultimately, this knowledge contributes to a safer and more enjoyable riding experience. Remember that regular maintenance and inspections are crucial for your safety. By being proactive, you can address potential issues before they arise. Keeping your hydraulic brakes in top condition will enhance your overall cycling experience. So, take the time to learn and apply these techniques effectively. Your future rides will be safer and more enjoyable as a result.


