Introduction to Bike Assembly
How to assemble a bike? Getting started with assembling your bike can be straightforward and rewarding. Before you begin, it’s important to have a clear workspace and the right tools at hand. Remember, taking the correct approach will not only save time but also ensure your bike is safe and enjoyable to ride.

Firstly, you’ll want to carefully unbox your bike and lay out all the parts. Inspect each component for any damage that may have occurred during shipping. If you spot any issues, address them before proceeding.
Most bikes come partially assembled to ease the process. Generally, you’ll only need to attach a few key parts, such as the pedals, handlebars, and possibly the front wheel. It’s crucial to follow the manufacturer’s instructions. This will prevent any damage and make sure the bike is assembled correctly.
It’s helpful to note that some bike shops offer a pre-assembly service, like Decathlon’s 90% pre-assembled bikes ordered online. This service means you only need to perform minimal assembly, such as attaching the pedals, adjusting the tire pressure, and positioning the handlebars and saddle.
Whether you’ve bought a bike online or from a store, knowing how to assemble a bike will empower you to make adjustments and repairs as needed. So, let’s get your cycling journey started with some key assembly tips in the sections to follow.
Identifying Pedal Orientations
When learning how to assemble a bike, it’s crucial to identify your pedals correctly. Because of their different threading, installing the left and right pedals requires distinct approaches. This helps prevent damage to the crank arms and ensures a secure fit.
Left Pedal: Reverse Threading
The left pedal has reverse threading. This means you must turn it counterclockwise to tighten it. It’s designed this way to prevent the pedal from unscrewing as you pedal forward. Start by greasing the threads lightly. Align the pedal with the hole on the crank, then turn it left to tighten. Be gentle to avoid cross-threading.
Right Pedal: Standard Threading
In contrast, the right pedal uses standard threading. To install it, you rotate it clockwise. This is the typical way most screws and bolts tighten. Again, apply a little grease to the threads first. Line up the pedal and turn it to the right. Make sure it’s snug but don’t over-tighten it.
For both pedals, it’s best to start by threading by hand to ensure correct alignment and to prevent stripping the threads. Once they’re in place, you can use a pedal wrench or a hex key to fully tighten them, ensuring they’re secure and ready for a ride. Always double-check both pedals are tight and properly installed before taking your bike out.

Tools and Kits Required for Assembly
To successfully assemble a bike, you need the right tools. A proper tool kit ensures an efficient and safe assembly process. Below is a list of essential tools you might need:
- Adjustable Wrench: This tool adjusts to various nut sizes, making it versatile for bike assembly.
- Allen Keys or Hex Wrenches: These are crucial for bolts on the majority of bike parts, including pedals and handlebars.
- Screwdrivers: Both flat-head and Phillips screwdrivers are useful in case screws need tightening.
- Pedal Wrench: Specifically designed for pedals, this wrench has a long handle for better leverage.
- Pump: Essential for inflating tires to the correct pressure.
- Grease: Apply it to threads like those on pedals to prevent seizing and ensure smooth installation.
- Plastic Tire Levers: These help with installing or removing tires without damaging the rims.
Make sure you have a clean, flat surface to work on. Arrange your tools so you know where everything is. It saves time and helps prevent any loss or damage. Next, we will go through the assembly process, ensuring you know how to assemble a bike using these tools effectively.
Step-by-Step Assembly Process
Now that you have your tools ready, let’s dive into the assembly process. Below, we will guide you through each step, helping you assemble your bike safely and efficiently.
Attaching Pedals
First, let’s start with attaching the pedals. Remember the differences in threading we discussed. Attach the right pedal by rotating it clockwise and the left pedal counterclockwise. Start threading by hand to ensure correct alignment and prevent cross-threading. Once hand-tightened, use a pedal wrench or hex key to fully secure the pedals.
Adjusting Tire Pressure
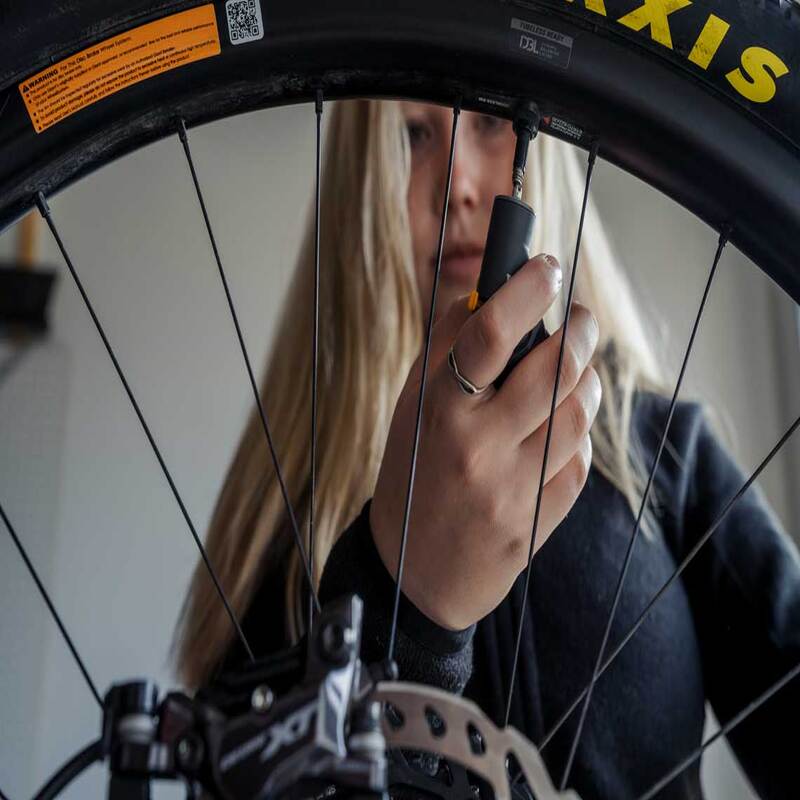
Next, adjust the tire pressure to ensure smooth and safe riding. Use a pump to inflate the tires to the pressure indicated on the tire sidewall. This varies by tire type and bike model but is typically between 80-120 PSI for road bikes and 30-50 PSI for mountain bikes. Check the pressure with a gauge to get it just right.
Positioning Handlebars
Properly positioning the handlebars is crucial for comfort and control. Loosen the bolts on the stem slightly and adjust the handlebars to your desired angle and height. Stand over the bike and make sure you have a natural reach to the handlebars without straining. Tighten the stem bolts back once you’re satisfied.
Setting Saddle Height
Lastly, set the saddle height. Stand next to the bike and adjust the saddle so that it’s roughly at hip level. Once on the bike, ensure you can pedal comfortably with your knees slightly bent at the lowest point. This helps prevent injuries. Tighten the seatpost clamp once you find the ideal height.
These steps will help you assemble your bike correctly. Always double-check each part for tightness and proper adjustment before your first ride.

Final Adjustments and Safety Checks
Before you hop on for your maiden voyage, it’s wise to do some final adjustments and perform safety checks. This last step is about ensuring everything is set for a safe and comfortable ride.
Check the Brakes: Squeeze both the front and rear brake levers to see if they engage properly. Make sure the brake pads align with the rim, not rubbing against the tire or missing the rim.
Inspect the Wheels: Spin each wheel to make sure they rotate freely without wobbling. Ensure quick-release levers or bolts are tight and wheels are secured firmly.
Tighten Bolts and Nuts: Use your Allen keys and adjustable wrench to give a final tighten to all bolts and nuts. Pay special attention to those on the saddle, handlebars, and pedals.
Test the Gears: Shift through the gears while the bike is stationary to verify the derailleur moves smoothly. This helps avoid any surprises during the ride.
Look Over the Chain: Check that the chain is well-lubricated, free of damage, and correctly seated on the gears.
Adjust the Saddle and Handlebars: If needed, tweak the angle and height of your saddle and handlebars one last time for optimal comfort.
By meticulously following this guide on how to assemble a bike and double-checking each component, you’ll ensure a smooth first ride. Now, enjoy the pride of a bike well-built and go for a spin!
Troubleshooting Common Assembly Issues
Even with a careful approach, you might encounter some issues when assembling your bike. Here’s how to address common problems you may face:
Pedal Installation Difficulties
If you’re struggling to install the pedals, ensure you have the correct pedal for each side. Remember, the right pedal has standard threading (tighten clockwise), and the left pedal has reverse threading (tighten counterclockwise). If a pedal won’t screw in, don’t force it. Double-check the threading and try again. Applying more grease can sometimes help ease the installation.
Tire Inflation Trouble
If the tire isn’t inflating, check the pump connection to the valve. Ensure it’s secure. If you still can’t inflate the tire, inspect the valve for damage or blockage. Sometimes, replacing the tube is necessary if there’s a puncture or the valve is faulty.
Handlebars Not Aligning
When the handlebars won’t align, loosen the stem bolts just enough to make adjustments. Align carefully before re-tightening. Avoid over-tightening as this can damage the bolt or strip the threads.
Saddle Adjusting Issues
If the saddle won’t stay in place, check that the seatpost clamp is tight enough. If it is and the saddle still moves, the clamp or post may be worn and need replacing. Ensure the seatpost is the correct size for your bike frame.
Addressing these common issues will help ensure your bike is assembled safely and ready to ride. Remember, if you encounter persistent problems or are unsure about any step, it’s always best to seek help from a professional mechanic.


