Identifying the Source of the Clicking Sound
Finding out why your bike clicking when pedaling is crucial. These sounds are not only annoying but can also indicate a potential issue that needs addressing. Before you can start fixing the problem, it’s essential to locate its source.
Common Areas: Pedals, Chain, and Derailleur
There are three main areas where a clicking sound can originate: the pedals, the chain, and the derailleur. Each area has specific parts that need to be checked to ensure they are functioning properly.
- Pedals: The connection point of the pedal to the crank arm is a common source. Dirt or looseness in this area can cause clicking.
- Chain: A misaligned or dirty chain can easily produce a clicking sound during bike rides. Proper alignment and cleanliness are vital.
- Derailleur: Incorrect derailleur settings can lead to clicking, especially when it misguides the chain.
Tools Needed for Diagnosis
To properly diagnose the source of the clicking sound, you will need a few essential tools:
- Adjustable Wrench: Useful for tightening or loosening the pedals and other components.
- Screwdrivers: Needed for adjusting the derailleur settings.
- Chain Checker Tool: Helps in assessing the chain’s wear and alignment.
Having the right tools not only simplifies the diagnosis but also helps in applying the correct fixes, ensuring your bike runs smoothly and quietly.
Steps to Inspect and Test Your Bike
Identifying the source of a clicking noise on your bike requires a methodical approach to ensure that any underlying issues are addressed. Here’s a detailed breakdown of the steps involved:
1. Visual Inspection Tips:
- Clean Your Bike: Start by thoroughly cleaning your bike. Dirt and grime can obscure potential problems, making it difficult to identify issues during your inspection.
- Wheel Examination: Rotate each wheel individually. This allows you to check for any warping or obstructions that may cause rubbing or clicking sounds.
- Pedals and Crank: Pay close attention to the pedals and crank area. Any looseness in these components can lead to a clicking noise when pedaling. Tighten any loose parts as needed.
- Brake System: Inspect the brake calipers and pads to ensure they are securely fastened. Loose brakes can produce clicking sounds when the bike is in motion.
2. Auditory Testing Methods:
- Test Ride: After the visual inspection, take your bike for a test ride in a quiet area. This setting helps you focus on any clicks without the interference of background noise.
- Gear Shifts: Shift through all the gears while riding. This action covers all functions of the bike and can help isolate the sound to specific components, such as the chain or derailleur.
- Listening for Changes: Pay attention to any changes in the clicking sound when applying different levels of pressure on the pedals. This can provide clues about where the issue lies.
By following these detailed steps, you can effectively diagnose and address the clicking noise, ensuring a smoother and safer ride.
Fixing Clicks in the Pedal Area
When addressing clicks in the pedal area, it’s crucial to focus on the connection point between the pedals and the crank arms. Over time, this connection can become loose, resulting in frustrating clicking sounds that disrupt your ride. Below are detailed steps to effectively resolve this issue.
Securing Your Bike
- Start by placing your bike in a stable position. You may want to use a bike stand or flip it upside down to prevent it from rolling. Ensuring your bike is secure will make the repair process much smoother and safer.
Tightening Loose Pedals
- Grab an adjustable wrench and prepare to tighten the pedal bolts. Locate the pedal arms and turn the wrench clockwise to tighten each bolt securely. Remember to apply sufficient pressure but avoid overtightening, which could damage the threads. It’s essential to check both pedals to ensure they have equal tightness, as uneven tension could lead to further issues.
Lubricating the Pedal Joints
- After you’ve tightened the pedals, the next step is lubrication. Apply a few drops of bike-specific lubricant to the joints where the pedals connect to the crank arms. This lubrication helps reduce friction and minimizes the chances of future clicking sounds. Rotate the pedals several times to distribute the lubricant evenly throughout the joints, ensuring a smooth operation.
By following these steps, you should effectively eliminate the annoying clicks in your pedal area and enhance your overall cycling experience. Regular maintenance can prevent similar issues in the future.
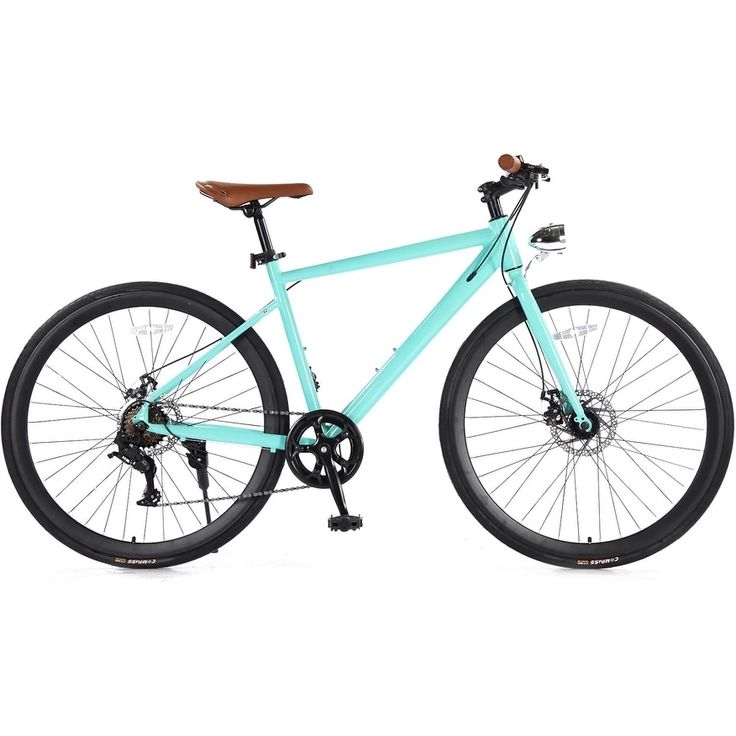
Addressing Chain and Derailleur Noises
After handling pedal-related noises, your attention might turn to the chain and derailleur. These components often cause clicking when riding your bike.
Adjusting the Chain Tension
Proper chain tension is crucial for smooth biking. A slack chain can lead to frequent clicking sounds when pedaling. To adjust the chain tension, shift to the smallest chainring. Then loosen the rear axle and pull it back until the chain feels tight but not overstrained. Tighten the axle back up securely. Check the chain by lifting and allowing it to drop. It shouldn’t sag or be too taut.
Cleaning and Lubricating the Derailleur
Dirt and debris can cause the derailleur to malfunction, leading to clicking noises. Start by cleaning the derailleur with a soft brush or cloth. Remove any grime or buildup around the jockey wheels and cage. Apply a bike-specific lubricant lightly to the moving parts, especially where the chain meets the derailleur. This helps in smoother gear shifts and reduces the likelihood of noises while riding.
Crankset and Bottom Bracket Solutions
Moving on from the pedals and chain, the crankset and bottom bracket are crucial components of your bike. These parts can also contribute to the clicking noise when pedaling.
Checking Crank Bolt Tightness
The crank bolts hold the crank arms to the bottom bracket spindle. If these bolts loosen, a clicking sound might occur. First, secure your bike. Then, use a suitable wrench to check each bolt. Tighten any loose bolts by turning them clockwise. Do this carefully to avoid over-tightening.
Replacing Worn Out Bottom Bracket
The bottom bracket may wear out after extensive use. This wear can lead to instability and noises. To replace a worn bottom bracket:
- Remove the crankset using a crank puller tool.
- Unscrew the old bottom bracket with a suitable wrench.
- Clean the bracket shell thoroughly.
- Install the new bottom bracket and reassemble the crankset.
Ensure all parts are tightly secured and aligned to prevent future clicking. Regularly check and maintain these areas for optimal bike performance.
Preventative Measures and Regular Maintenance
Taking care of your bike can prevent problems before they start. Consistent maintenance helps keep clicks away and your rides smooth.
Routine Cleaning and Lubrication
To stop bike clicking when pedaling, clean and oil your bike often. Dirt can cause noises, so remove it with a gentle wash. Use bike-specific oil on chains, pedals, and derailleurs. This cuts down friction and noise.
- Clean your bike after each ride or weekly.
- Apply lubricant in small amounts to moving parts.
- Wipe excess oil to keep dirt from sticking.
Regular Inspection Schedule
Set a schedule to check your bike. Look out for loose bolts, worn parts, and misalignments. Tighten and adjust as needed.
- Inspect your bike before long rides.
- Check for wear and tear monthly.
- Get a professional tune-up yearly.
Regular care will keep you riding with confidence, without annoying clicks or unexpected issues.
