Introduction: Why Ship a Bike?
Shipping a bike can be necessary for various reasons, from relocating to participating in distant cycling events. Whether you’re moving to a new city, selling a bike to a buyer far away, or transporting your bike for a vacation or race, knowing how to ship a bike safely and efficiently is essential. Proper shipping ensures that the bike arrives in pristine condition without any damage to its components.
Understanding the process of shipping a bike involves more than just packing it in a box. It requires careful disassembly, choosing appropriate packaging materials, selecting a reliable shipping method, and sometimes navigating customs procedures if shipping internationally. Each step is crucial to ensure the bike’s safety and avoid unnecessary delays or costs.
Moreover, the cost of shipping can vary significantly based on factors like distance, shipping method, and carrier. Balancing cost with the need for safety and reliability is key to a successful shipping experience. Preparing to ship a bike involves detailed planning and adherence to best practices to ensure a smooth and hassle-free process.
In this guide, we will explore the detailed steps and tips for shipping a bike effectively. By understanding the complete process, you can make informed decisions and ensure your bike reaches its destination safely and in perfect condition.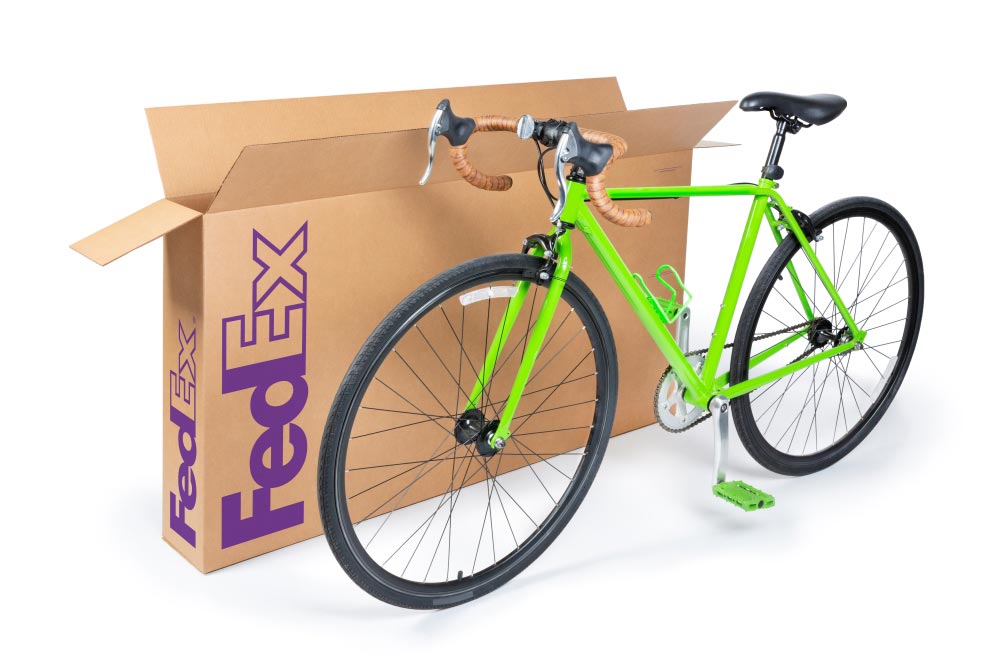
Preparing Your Bike for Shipping
Gathering Necessary Tools and Materials
Before you begin the process of shipping your bike, gather all the necessary tools and materials. Proper preparation ensures that you have everything on hand to disassemble, pack, and ship your bike efficiently. Here’s a list of essential items you’ll need: a bike box, bubble wrap, foam padding, zip ties, packing tape, a pedal wrench, Allen wrenches, and an adjustable wrench.
A bike box is crucial for protecting your bike during transit. You can obtain a sturdy, bike-specific box from a local bike shop or shipping company. Ensure the box is large enough to accommodate your bike and any additional padding required for protection.
Bubble wrap and foam padding are essential for cushioning the bike’s components. These materials help absorb shocks and prevent damage to delicate parts. Zip ties are useful for securing loose parts, such as the handlebars and pedals, to prevent them from moving around during shipping.
Packing tape is needed to seal the box securely, ensuring that it remains closed throughout the transit. A pedal wrench, Allen wrenches, and an adjustable wrench are necessary tools for disassembling various parts of the bike, such as the pedals, handlebars, and wheels. Having all these tools and materials ready before you start ensures a smooth and efficient packing process.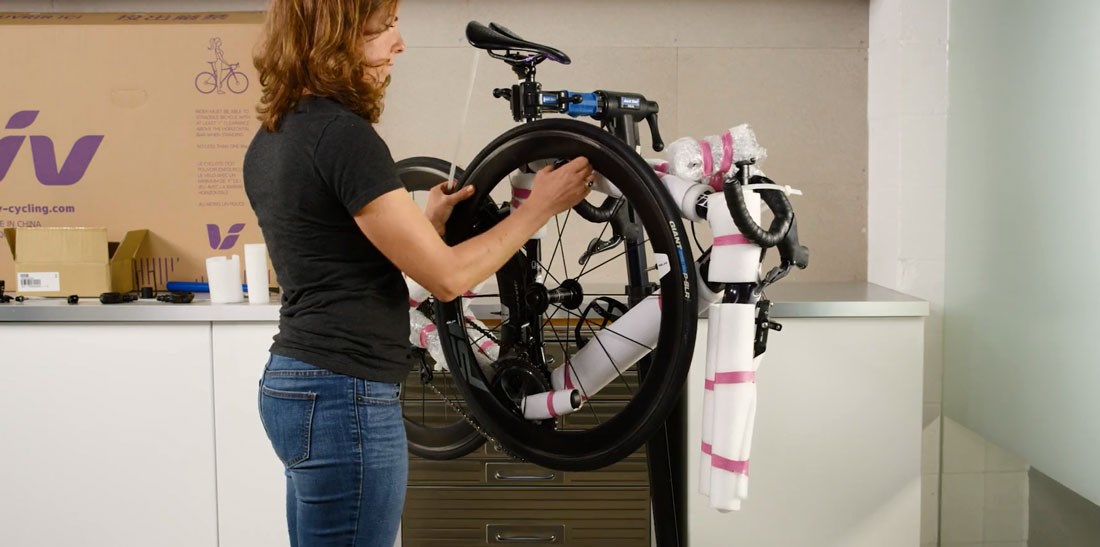
Disassembling the Bike
Disassembling the bike is a critical step in preparing it for shipping. Proper disassembly reduces the bike’s size, making it easier to pack and minimizing the risk of damage during transit. Follow these steps to disassemble your bike safely and efficiently:
- Remove the Pedals: Use a pedal wrench to unscrew the pedals. Turn the right pedal clockwise and the left pedal counter-clockwise to remove them. Once removed, wrap the pedals in bubble wrap and secure them with packing tape.
- Remove the Handlebars: Use an Allen wrench to loosen the bolts securing the handlebars. Carefully detach the handlebars from the stem, leaving all cables intact. Wrap the handlebars in bubble wrap and secure them to the top tube or frame using zip ties.
- Remove the Wheels: Use an adjustable wrench or quick-release lever to remove the front and rear wheels. For the rear wheel, shift the chain to the smallest cog before removing it. Wrap the wheels in bubble wrap or foam padding and place them in dedicated wheel bags if available.
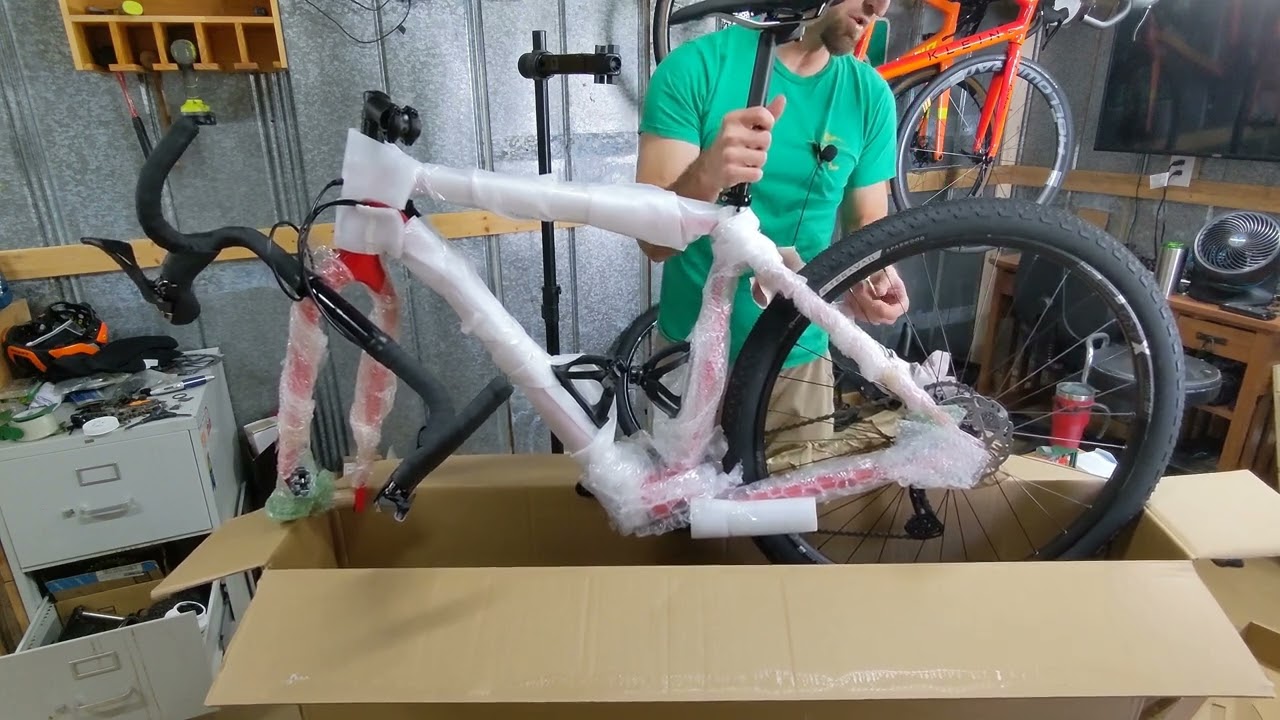
- Protect the Frame: Use foam padding or pipe insulation to cover the bike frame, particularly the top tube, down tube, and chainstays. Secure the padding with zip ties or packing tape to ensure it stays in place during transit.
- Remove Additional Components: If necessary, remove additional components such as the seatpost, derailleur, or any accessories like water bottle cages and bike lights. Wrap these parts in bubble wrap and secure them with packing tape.
Carefully disassembling your bike reduces the risk of damage and makes it easier to pack. Taking the time to protect each component ensures that your bike arrives at its destination in perfect condition.
Packing Your Bike for Shipping
Choosing the Right Box
Selecting the right box is crucial for packing your bike securely and ensuring its safety during transit. A bike-specific box is designed to accommodate the various components of a disassembled bike, providing adequate space and protection. You can obtain a sturdy bike box from a local bike shop, a shipping company, or purchase a reusable bike travel case.
When choosing a box, ensure it is large enough to fit your bike’s frame, wheels, and all other components. The box should also have enough space for padding and protective materials to prevent any movement of the bike parts during shipping. A snug fit is essential to minimize the risk of damage.
If using a cardboard bike box, inspect it for any signs of wear, tears, or damage. A sturdy and intact box is vital for providing adequate protection. If using a reusable bike travel case, ensure it is in good condition and all latches and zippers work properly.
In addition to the bike box, consider using a second smaller box for loose components, such as pedals, handlebars, and accessories. This smaller box can be placed inside the bike box, ensuring all parts are organized and protected.
Choosing the right box sets the foundation for effective packing and shipping. A sturdy and appropriately sized box ensures your bike is well-protected and ready for a safe journey.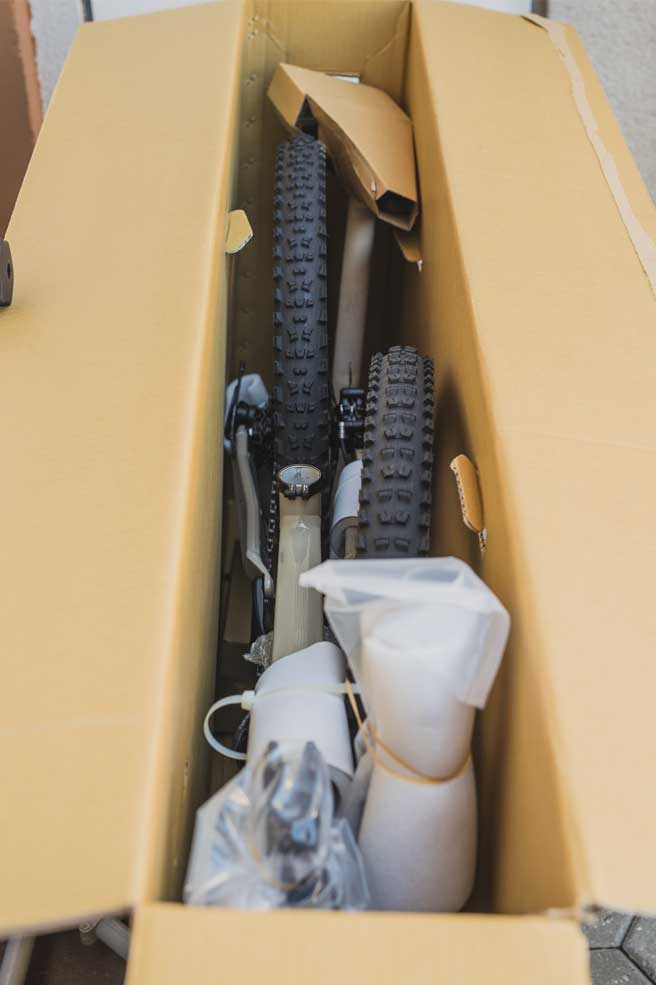
Packing the Bike Components
With the bike disassembled and the appropriate box selected, the next step is to pack the bike components securely. Proper packing ensures that each part is protected and minimizes the risk of damage during transit.
- Frame: Place the padded bike frame in the box first. Ensure the frame is centered and stable. Use additional foam padding or bubble wrap to fill any gaps around the frame, preventing it from moving inside the box.
- Wheels: Place the wrapped wheels on either side of the frame. If using a cardboard box, consider placing cardboard dividers between the wheels and the frame for added protection. Ensure the wheels are secure and do not press against the frame or other components.
- Handlebars and Pedals: Place the wrapped handlebars and pedals in the smaller box or secure them within the main box. Use bubble wrap or foam padding to cushion these parts and prevent movement.
- Additional Components: Pack any additional components, such as the seatpost, derailleur, and accessories, in the smaller box or within the main box. Ensure they are wrapped and cushioned to avoid damage.
- Securing Everything: Once all components are packed, use zip ties to secure any loose parts and prevent movement. Fill any remaining gaps with bubble wrap, foam padding, or packing paper to ensure all parts are stable and protected.
- Sealing the Box: Close the box and use packing tape to seal all edges and seams securely. Reinforce the corners and handles with extra tape for added strength. Label the box with your contact information, the recipient’s address, and any handling instructions, such as “Fragile” or “This Side Up.”
Proper packing ensures that all bike components are protected and securely arranged within the box. This attention to detail minimizes the risk of damage and ensures your bike arrives safely.
Shipping and Delivery
Choosing a Shipping Method
Selecting the right shipping method is crucial for ensuring the safe and timely delivery of your bike. Various shipping options are available, each offering different levels of service, cost, and delivery times. Understanding these options helps you make an informed decision based on your specific needs.
- Standard Ground Shipping: This method is cost-effective and suitable for domestic shipments. Ground shipping typically takes longer but is ideal for non-urgent deliveries. Carriers like UPS, FedEx, and USPS offer ground shipping services with tracking and insurance options.
- Expedited Shipping: If time is a priority, consider expedited shipping options. Services like FedEx Express and UPS Next Day Air provide faster delivery times at a higher cost. Expedited shipping is ideal for urgent shipments, such as sending a bike to a race or event.
- Freight Shipping: For larger bikes or bulk shipments, freight shipping is a viable option. Freight carriers specialize in transporting larger and heavier items, providing additional handling and protection. This method is suitable for businesses or individuals shipping multiple bikes.
- Specialized Bike Shipping Services: Several companies specialize in bike shipping, offering tailored services for cyclists. Companies like BikeFlights and ShipBikes provide dedicated bike shipping solutions, ensuring safe handling and delivery. These services often include discounts, tracking, and insurance options.
- International Shipping: If shipping a bike internationally, consider using carriers with expertise in international logistics. Services like DHL, FedEx International, and UPS Worldwide offer comprehensive international shipping solutions, including customs handling and documentation.
Choosing the right shipping method ensures that your bike reaches its destination safely and within the desired timeframe. Consider factors like delivery time, cost, and handling when selecting a shipping option.
Handling Customs and Documentation
If shipping a bike internationally, navigating customs and documentation is a vital step. Proper handling of customs procedures ensures a smooth and hassle-free delivery process.
- Customs Declaration: Complete a customs declaration form accurately, detailing the contents, value, and purpose of the shipment. Provide clear descriptions and declare the bike as used or new, as this affects customs duties and taxes.
- Commercial Invoice: Include a commercial invoice for international shipments. This document provides detailed information about the value and contents of the shipment, aiding customs clearance. Ensure the invoice is accurate and matches the customs declaration.
- Shipping Labels: Affix accurate shipping labels to the box, including the recipient’s address, your contact information, and any handling instructions. Some carriers provide pre-paid labels with customs information embedded.
- Insurance: Consider purchasing insurance for international shipments. Insurance coverage protects against lost or damaged packages during transit, providing peace of mind.
- Tracking: Use tracking services provided by the carrier to monitor the shipment’s progress. Tracking ensures you stay informed about the delivery status and can address any issues promptly.
Handling customs and documentation accurately ensures compliance with international shipping regulations and facilitates a smooth delivery process. Proper documentation minimizes delays and ensures your bike arrives safely at its international destination.
Receiving and Assembling the Bike
Once the bike arrives at its destination, the final step is to receive and reassemble it. Proper handling and careful reassembly ensure the bike is ready for use without any issues.
- Inspect the Box: Check the box for any signs of damage upon arrival. If you notice any damage, document it and contact the shipping carrier to file a claim if necessary.
- Unpacking: Carefully unpack the bike components, removing all protective padding and wrapping. Lay out all parts and tools, ensuring nothing is missing or damaged.
- Reassembling the Bike: Follow these steps to reassemble your bike:
- Install the Wheels: Attach the front and rear wheels, ensuring they are properly aligned and secure.
- Attach the Handlebars: Reattach the handlebars to the stem, tightening the bolts with an Allen wrench.
- Install the Pedals: Use a pedal wrench to screw the pedals onto the cranks, tightening securely.
- Adjust the Seatpost: Insert the seatpost into the frame and adjust it to the desired height. Tighten the seatpost clamp.
- Check for Alignment and Tightness: Ensure all bolts and components are properly tightened and aligned. Check the brakes, gears, and other critical systems for functionality.
- Test Ride: Take the bike for a test ride to ensure everything is working correctly. Make any necessary adjustments to ensure a smooth and comfortable ride.
Reassembling the bike carefully ensures it is ready for use and performs optimally. Proper handling and attention to detail during reassembly complete the shipping process, allowing you to enjoy your bike at its new destination.
Conclusion
Shipping a bike involves careful planning, proper disassembly, secure packing, and selecting the right shipping method. Each step is crucial to ensure the bike arrives safely and in perfect condition. Gathering necessary tools and materials, disassembling the bike, choosing the right box, and packing the components securely are essential steps in the process.
Handling customs and documentation accurately facilitates smooth international shipping, while choosing the right shipping method ensures timely and safe delivery. Finally, reassembling the bike carefully ensures it is ready for use upon arrival.
By following this comprehensive guide, you can ship your bike with confidence, knowing it will reach its destination safely and ready for the road. Proper preparation and attention to detail ensure a successful and stress-free bike shipping experience.