Introduction: Why Measuring a Bike Frame Matters
Measuring a bike frame accurately is crucial for ensuring a comfortable and efficient riding experience. A correctly measured frame allows you to choose a bike that fits your body dimensions and riding style, thereby enhancing performance and reducing the risk of injury. Whether you’re buying a new bike, fitting a pre-owned one, or simply curious about your current bike’s dimensions, understanding how to measure a bike frame is essential.
Selecting a bike with the right frame size impacts various aspects of cycling, including comfort, control, and efficiency. An incorrectly sized bike can cause discomfort, strain, and inefficient pedaling, detracting from the overall riding experience. Conversely, a well-fitted bike promotes better posture, smoother rides, and enhanced performance.
Moreover, knowing how to measure a bike frame is useful when making adjustments or customizations. Adjusting components like the saddle, handlebars, and pedals based on frame measurements ensures optimal positioning and comfort. Additionally, accurate measurements are vital for understanding compatibility with accessories and replacement parts.
Understanding the importance of measuring a bike frame sets the foundation for exploring the various methods and steps involved. In this comprehensive guide, we will delve into the detailed process of measuring a bike frame, ensuring you can choose the perfect bike size for your needs.
Preparing to Measure the Bike Frame
Gathering Necessary Tools and Materials
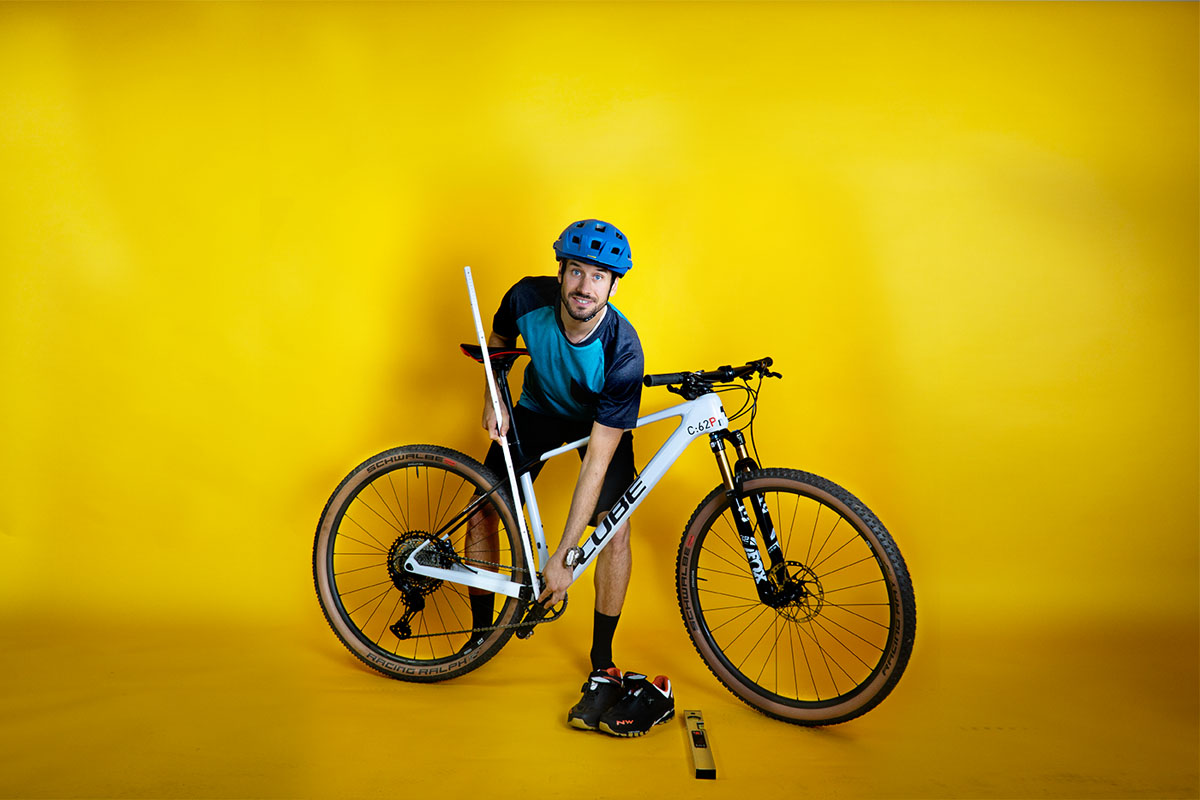
Before you begin measuring a bike frame, gather all the necessary tools and materials. Proper preparation ensures a smooth and accurate measurement process. Here’s a list of essential items you’ll need: a tape measure, a spirit level, a piece of paper, a pen, and a sturdy wall or working surface.
A tape measure is crucial for taking accurate measurements of the bike frame. Ensure the tape measure is long enough to measure the entire length of the frame. A flexible tape measure, like one used by tailors, is ideal for navigating the curves and angles of the bike frame.
A spirit level is useful for ensuring that the bike is positioned correctly and that measurements are taken at the right angles. This tool helps maintain accuracy and consistency throughout the measurement process. If you don’t have a spirit level, a smartphone app can serve as a reliable alternative.
A piece of paper and a pen are essential for recording your measurements. Writing down the measurements as you go ensures you don’t forget or confuse any values. It also provides a reference for future adjustments or comparisons.
Finally, choose a sturdy wall or working surface where you can securely place the bike. Ensuring the bike remains stable throughout the measurement process is crucial for obtaining accurate and consistent measurements.
Gathering the right tools and materials before you start ensures a smooth and efficient measurement process. Proper preparation lays the foundation for accurate and reliable frame measurements.
Positioning the Bike Correctly
Once you have gathered all the necessary tools and materials, the next step is to position the bike correctly. Proper positioning ensures accurate measurements and consistency throughout the process. Follow these steps to position the bike:
- Find a Stable Surface: Place the bike on a level and stable surface, such as a concrete floor or a solid workbench. Ensuring stability is crucial for accurate measurements.
- Position Against a Wall: If using a wall, place the bike parallel to the wall, ensuring both wheels are touching the ground. Use a spirit level to check that the bike is perfectly vertical and not leaning to one side.
- Check Wheel Alignment: Ensure the front and rear wheels are aligned straight and not turned to either side. Proper wheel alignment helps maintain accuracy when measuring frame dimensions.
- Secure the Bike: If needed, use a bike stand or have someone hold the bike to ensure it remains stable and upright. Avoid any movement or shifting during the measurement process to maintain accuracy.
By positioning the bike correctly, you create a stable and reliable setup for taking precise measurements. Proper alignment and stability are critical for obtaining accurate frame dimensions.
Measuring the Bike Frame
Measuring the Seat Tube Length
One of the most critical measurements when determining bike frame size is the seat tube length. The seat tube length affects the overall fit and comfort of the bike. Follow these steps to measure the seat tube length accurately:
- Locate the Seat Tube: The seat tube is the vertical tube that runs from the bottom bracket (where the pedals attach) to the point where the seat post is inserted. Identify this tube on the bike frame.
- Measure from Bottom Bracket to Top of Seat Tube: Place the end of the tape measure at the center of the bottom bracket. Extend the tape measure upward to the top of the seat tube, where the seat post is inserted. Ensure the tape measure is straight and follows the length of the seat tube.
- Record the Measurement: Once you have the measurement, record it on your piece of paper. This value represents the seat tube length and is typically expressed in centimeters (cm) or inches (in).
The seat tube length is a fundamental measurement that helps determine the appropriate frame size. Accurate measurement of the seat tube length ensures you choose a bike that fits your body dimensions correctly.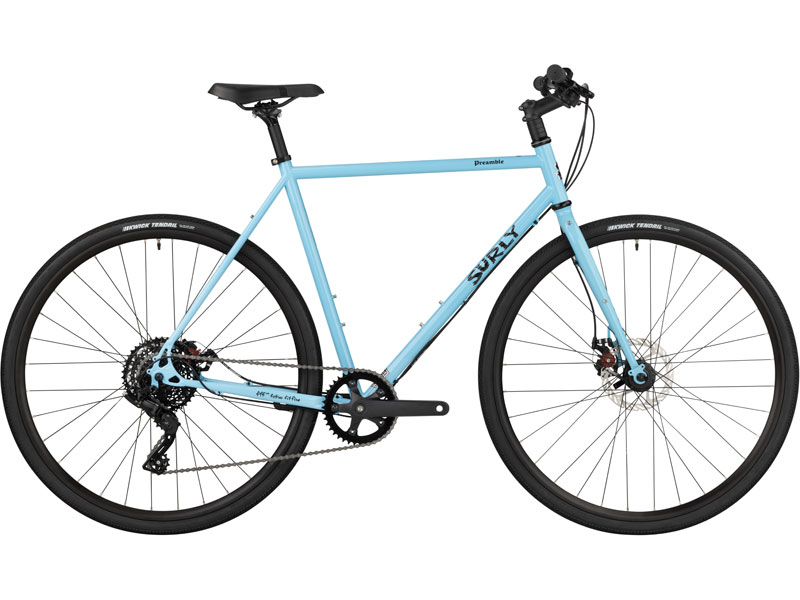
Measuring the Top Tube Length
The top tube length is another critical dimension that affects the bike’s fit and riding comfort. The top tube runs horizontally (or nearly horizontally) from the head tube (where the handlebars attach) to the seat tube. Follow these steps to measure the top tube length accurately:
- Locate the Top Tube: Identify the top tube on the bike frame, which connects the head tube to the seat tube. This tube typically runs parallel to the ground or slopes slightly.
- Measure from Head Tube to Seat Tube: Place the end of the tape measure at the center of the head tube. Extend the tape measure horizontally to the center of the seat tube. Ensure the tape measure follows the angle or slope of the top tube accurately.
- Record the Measurement: Once you have the measurement, record it on your piece of paper. This value represents the top tube length and is typically expressed in centimeters (cm) or inches (in).
The top tube length is crucial for determining your reach and overall riding posture. Accurate measurement of the top tube length ensures you select a bike that offers optimal comfort and control.
Measuring the Head Tube Length
The head tube length affects the bike’s handling and rider’s posture. The head tube is the short vertical tube at the front of the bike frame that connects the top tube to the down tube and houses the steering mechanism. Follow these steps to measure the head tube length accurately:
- Locate the Head Tube: Identify the head tube on the bike frame, which connects the top tube to the down tube. This tube houses the steering mechanism and is typically found at the front of the frame.
- Measure the Length of the Head Tube: Place the end of the tape measure at the bottom of the head tube, where it meets the down tube. Extend the tape measure vertically to the top of the head tube, where it meets the top tube. Ensure the tape measure follows the length of the head tube accurately.
- Record the Measurement: Once you have the measurement, record it on your piece of paper. This value represents the head tube length and is typically expressed in centimeters (cm) or inches (in).
The head tube length influences the bike’s handling and vertical distance between the handlebars and the ground. Accurate measurement of the head tube length ensures you choose a bike that provides the right balance between comfort and control.
Measuring the Chainstay Length
The chainstay length affects the bike’s stability and handling. The chainstay is the tube that runs from the bottom bracket to the rear dropout, parallel to the ground. Follow these steps to measure the chainstay length accurately:
- Locate the Chainstay: Identify the chainstay on the bike frame, which runs from the bottom bracket to the rear dropout. This tube is typically parallel to the ground.
- Measure from Bottom Bracket to Rear Dropout: Place the end of the tape measure at the center of the bottom bracket. Extend the tape measure horizontally to the center of the rear dropout, where the rear axle attaches. Ensure the tape measure follows the length of the chainstay accurately.
- Record the Measurement: Once you have the measurement, record it on your piece of paper. This value represents the chainstay length and is typically expressed in centimeters (cm) or inches (in).
The chainstay length influences the bike’s stability and agility, affecting overall riding dynamics. Accurate measurement of the chainstay length ensures you select a bike that offers balanced handling characteristics.
Finalizing Measurements and Choosing the Right Fit
Interpreting Your Measurements
Once you have taken and recorded all the measurements, the next step is to interpret them and choose the right bike frame size. Refer to the bike manufacturer’s size chart or geometry chart to find the frame size that corresponds to your measurements. Bike size charts typically provide recommended frame sizes based on seat tube length, top tube length, and other key dimensions.
Compare your measurements with the manufacturer’s recommendations to determine the ideal frame size. If your measurements fall between two sizes, consider your riding style and preferences. A smaller frame size offers a more aggressive and nimble ride, while a larger frame provides more stability and comfort.
Understanding how to interpret your measurements helps you make an informed decision when choosing a bike frame. Proper interpretation ensures you select a frame size that fits your body dimensions and riding style perfectly.
Making Adjustments and Customizations
In some cases, you may need to make adjustments or customizations to ensure the perfect fit. Components like the saddle, handlebars, and stem can be adjusted to fine-tune the bike’s fit and comfort.
- Adjusting the Saddle Height: Adjust the saddle height to ensure proper leg extension. Your leg should be slightly bent at the bottom of the pedal stroke.
- Adjusting the Handlebar Height and Angle: Adjust the handlebar height and angle to achieve a comfortable riding posture. Ensure the handlebars are at a height that provides a relaxed shoulder position.
- Selecting the Right Stem Length: Choose a stem length that provides the right reach and handling characteristics. A shorter stem offers more agile handling, while a longer stem provides stability.
Making these adjustments and customizations ensures that your bike fits perfectly and offers optimal comfort and performance. Tailoring the bike to your specific needs enhances the overall riding experience.
Test Riding and Fine-Tuning
After selecting the right frame size and making necessary adjustments, the final step is to test ride the bike. A test ride allows you to assess the fit and make any fine-tuning adjustments as needed.
- Take a Test Ride: Ride the bike on various terrains and assess comfort, control, and efficiency. Pay attention to how the bike feels and whether any adjustments are needed.
- Make Fine-Tuning Adjustments: Based on the test ride, make any fine-tuning adjustments to the saddle height, handlebar position, and stem length. Ensure that all components are tightened securely after adjustments.
- Seek Professional Guidance: If needed, seek professional guidance from a bike shop for a professional bike fitting. A professional fitting provides expert insights and ensures the perfect fit.
A proper test ride and fine-tuning ensure that your bike fits perfectly and performs optimally. This final step completes the process of measuring and fitting a bike frame, ensuring a comfortable and efficient riding experience.
Conclusion
Measuring a bike frame accurately is essential for selecting the right frame size and achieving optimal comfort and performance. Understanding the importance of frame measurements, gathering the necessary tools, and following a structured process ensures accurate and reliable measurements.
Interpreting your measurements and making necessary adjustments ensures that your bike fits your body dimensions and riding style perfectly. A proper test ride and fine-tuning complete the process, ensuring a comfortable and efficient riding experience.
With this comprehensive guide, you now have the knowledge and techniques to measure a bike frame accurately and choose the right fit. Proper frame measurements and fitting enhance your cycling experience, providing comfort, control, and efficiency on every ride.