
Introduction to Bike Chain Maintenance
The Importance of a Clean Bike Chain
Maintaining your bike chain is crucial for ensuring a smooth and efficient ride. A clean bike chain not only enhances performance but also extends the lifespan of your bike’s drivetrain components. Over time, dirt, grime, and debris can accumulate on the chain, leading to increased friction and wear. Consequently, this buildup can significantly impact your bike’s efficiency, making pedaling harder and causing premature wear on the chainrings and cassette.
Furthermore, a dirty chain can cause shifting issues, leading to missed gears and an overall rougher ride. Regular cleaning helps ensure smoother gear transitions and a more comfortable cycling experience. Additionally, keeping your chain clean reduces the likelihood of rust and corrosion, which can weaken the chain links and increase the risk of chain failure.
In essence, regular bike chain maintenance is essential for both performance and safety. Neglecting to clean your chain can lead to costly repairs and replacements down the line. By taking the time to clean and lubricate your chain regularly, you can enjoy a more reliable and enjoyable cycling experience.
Moreover, cleaning your bike chain is a simple task that requires minimal tools and time. With the right approach and techniques, you can efficiently maintain your bike chain and keep it in optimal condition. This comprehensive guide provides step-by-step instructions and valuable tips for cleaning your bike chain.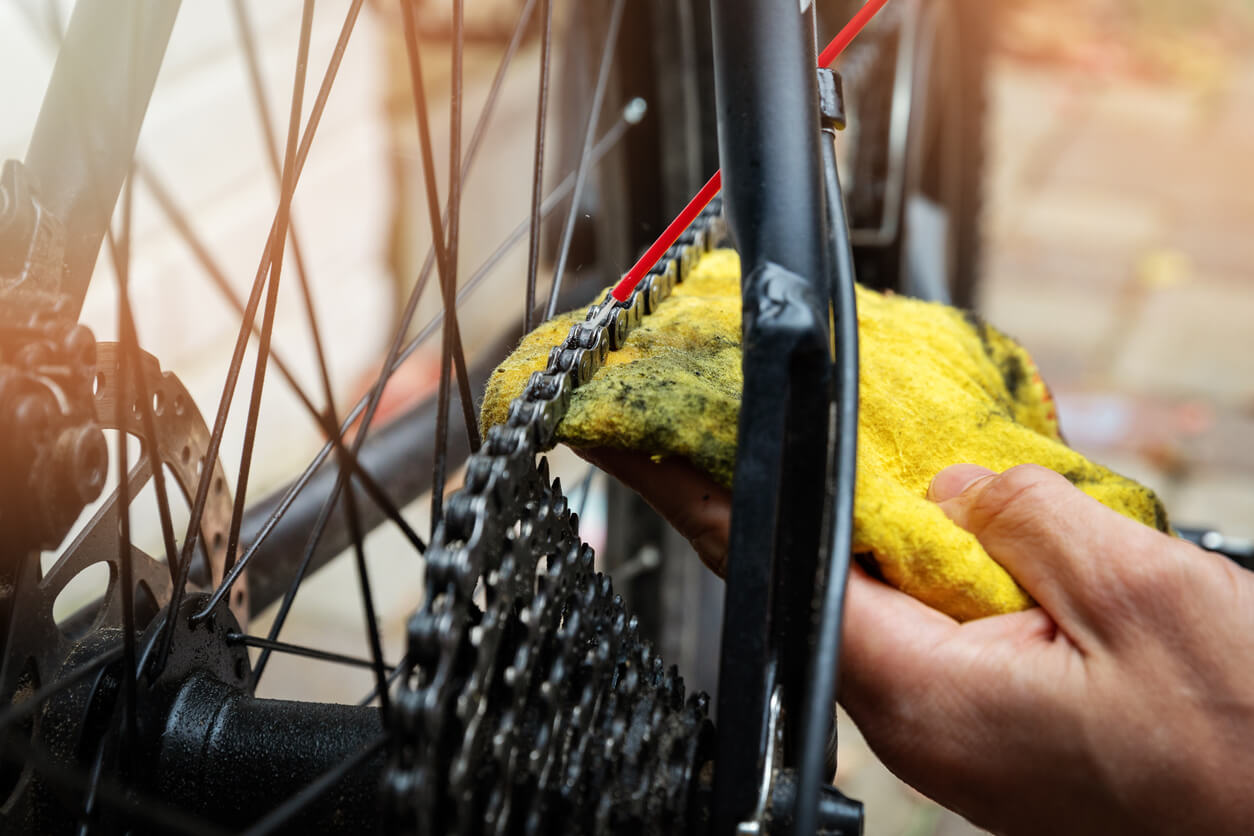
When to Clean Your Bike Chain
Knowing when to clean your bike chain is just as important as knowing how to clean it. The frequency of cleaning depends on various factors, including riding conditions, mileage, and the type of terrain you ride on. For instance, if you frequently ride on dusty or muddy trails, your chain will accumulate dirt and grime more quickly, necessitating more frequent cleaning.
As a general rule of thumb, it’s advisable to clean your bike chain every 100-200 miles, or after every few rides if you ride in harsh conditions. However, you may need to clean it more often if you notice excessive buildup of dirt, poor shifting performance, or unusual noises coming from the drivetrain.
Regular inspections of your bike chain can help you determine when it needs cleaning. Look for visible signs of dirt, grit, and debris on the chain links and rollers. Additionally, run your finger along the chain to check for excessive grime or a tacky, sticky feel. These are clear indicators that it’s time to clean your chain.
By paying attention to the riding conditions and regularly inspecting your bike chain, you can establish an effective maintenance routine. Timely cleaning ensures optimal performance and longevity of your bike’s drivetrain components.
Now that we understand the importance and timing of chain cleaning, let’s delve into the detailed process of cleaning your bike chain effectively.
Preparing for Chain Cleaning
Gathering Necessary Tools and Supplies
Before you begin cleaning your bike chain, gather all the necessary tools and supplies. Having everything on hand ensures a smooth and efficient cleaning process. Here’s a list of essential items you’ll need: a bike stand (optional but helpful), a chain cleaner tool or a stiff-bristled brush, degreaser, clean rags, and chain lubricant.
A bike stand can be incredibly useful as it allows you to elevate the bike, providing easier access to the chain and drivetrain components. If you don’t have a bike stand, you can flip the bike upside down, resting it on the handlebars and saddle. Ensure the bike is stable and secure before you start cleaning.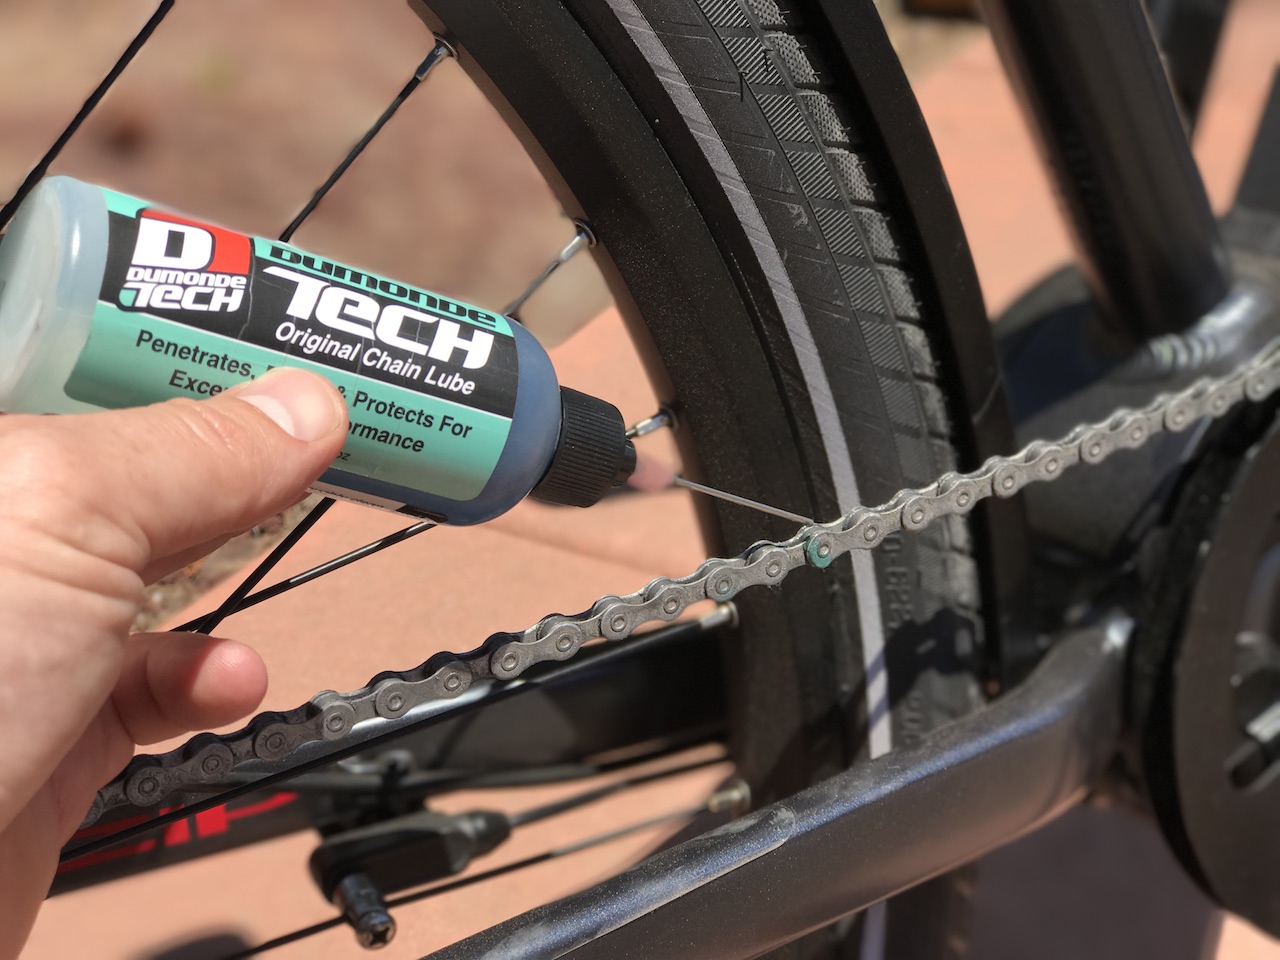
A chain cleaner tool is a convenient option for cleaning your chain thoroughly. It typically attaches to the chain and allows you to clean it efficiently by passing through rotating brushes. Alternatively, you can use a stiff-bristled brush to scrub the chain manually. Both methods are effective, so choose the one that suits your preference and available tools.
Degreaser is a crucial cleaning agent that helps break down and remove stubborn grime and grease from the chain. Look for a bike-specific degreaser, as it is formulated to be safe for your bike’s components. Avoid using household degreasers or solvents, as they may damage the chain and other parts.
Clean rags are essential for wiping off excess dirt and degreaser. You’ll need a few rags to ensure thorough cleaning and drying of the chain. Additionally, have a clean rag or paper towel handy for applying the chain lubricant after cleaning.
Gathering the right tools and supplies beforehand sets the foundation for a successful chain cleaning session. Proper preparation ensures you have everything you need to complete the task efficiently and effectively.
Preparing Your Bike and Work Area
Once you have gathered the necessary tools and supplies, it’s time to prepare your bike and work area. Start by placing your bike on the bike stand or flipping it upside down if you don’t have a stand. Ensure the bike is stable and secure to prevent any accidents during the cleaning process.
Next, shift the chain to the smallest chainring and smallest rear cog. This position allows the chain to be slack and easier to work with. It also minimizes the risk of damaging the drivetrain components during cleaning.
If you’re using a chain cleaner tool, follow the manufacturer’s instructions to attach it to the chain. Fill the chain cleaner tool with the recommended amount of degreaser. If you’re using a stiff-bristled brush, prepare a small container or bowl with degreaser to dip the brush into.
Before you start cleaning, it’s a good idea to place a piece of cardboard or old newspaper under the bike to catch any drips or debris. This helps protect your work area from getting dirty and makes cleanup easier.
With your bike and work area prepared, you’re ready to begin the cleaning process. Proper preparation ensures a smooth and efficient cleaning session, allowing you to focus on getting your bike chain spotless.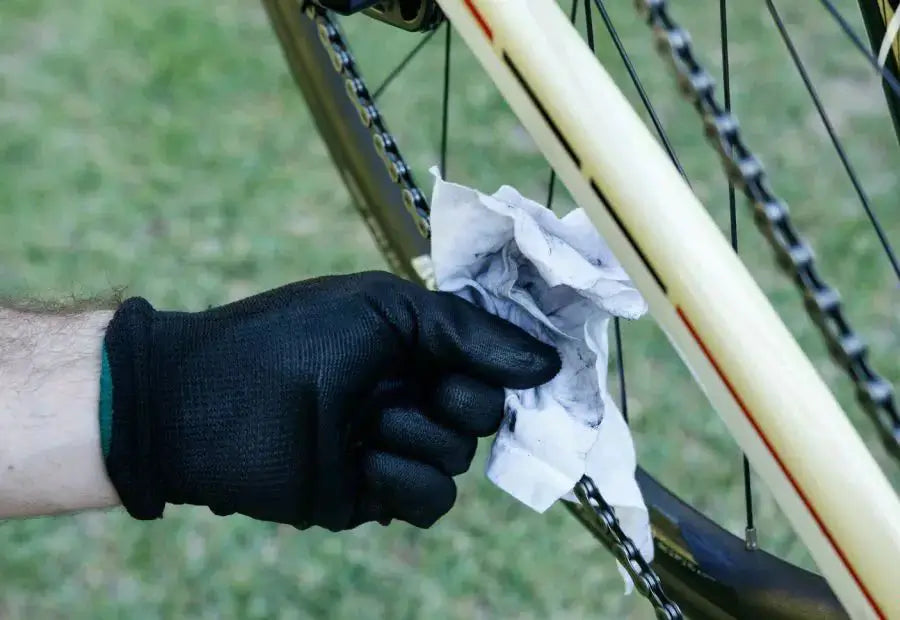
Cleaning the Bike Chain
Applying Degreaser
The first step in cleaning your bike chain is to apply the degreaser. Degreaser is a powerful cleaning agent that helps break down and remove accumulated grime, grease, and dirt from the chain. Proper application of the degreaser ensures thorough cleaning and optimal performance.
If you’re using a chain cleaner tool, fill it with the recommended amount of degreaser. Attach the chain cleaner tool to the chain, ensuring it is securely in place. Rotate the pedals backward to run the chain through the cleaner. The rotating brushes inside the tool will scrub the chain and remove dirt and grime.
If you’re using a stiff-bristled brush, dip the brush into the degreaser and apply it directly to the chain. Hold the brush against the chain while rotating the pedals backward. Scrub the chain thoroughly, focusing on each link and roller to ensure all dirt and grime are removed.
Allow the degreaser to sit on the chain for a few minutes to break down the grease and dirt. This period gives the degreaser time to penetrate and loosen the grime, making it easier to remove during the scrubbing process.
Proper application of the degreaser is crucial for effective cleaning. By allowing it to break down the grime, you ensure a thorough and efficient cleaning process.
Scrubbing the Chain
With the degreaser applied and given time to work, the next step is to scrub the chain thoroughly. Scrubbing helps remove stubborn dirt, grime, and old lubricant, ensuring the chain is clean and ready for lubrication.
If you’re using a chain cleaner tool, continue rotating the pedals backward to run the chain through the cleaner. The rotating brushes inside the tool will scrub the chain, removing dirt and grime effectively. Run the chain through the cleaner several times until it appears clean.
If you’re using a stiff-bristled brush, scrub the chain manually. Focus on each link and roller, ensuring all surfaces are cleaned thoroughly. Rotate the pedals backward while scrubbing to cover the entire length of the chain. Pay attention to the areas between the links, as dirt and grime can accumulate there.
For stubborn grime or hard-to-reach areas, use a smaller brush, such as an old toothbrush, to scrub the chain. This helps remove any remaining dirt and ensures a thorough cleaning.
After scrubbing, wipe the chain with a clean rag to remove excess degreaser and dirt. Use a separate clean rag to ensure thorough drying and prevent dirt from being reintroduced.
Thorough scrubbing is essential for removing all dirt and grime from the chain. This step ensures the chain is clean and ready for lubrication, enhancing its performance and longevity.
Rinsing and Drying the Chain
Once you have thoroughly scrubbed the chain, the next step is to rinse and dry it. Rinsing helps remove any remaining degreaser and dirt, while drying ensures the chain is ready for lubrication.
If you’re using an outdoor area, you can rinse the chain with water using a low-pressure hose or a water spray bottle. Avoid using high-pressure water, as it can force water into the bearings and other components, causing potential damage.
If you’re working indoors or prefer not to use water, you can use a clean, damp rag to wipe down the chain. This method helps remove any remaining degreaser without the risk of water damage.
After rinsing, use a clean, dry rag to thoroughly dry the chain. Run the rag along the length of the chain, ensuring all surfaces are dry. Pay attention to the areas between the links to remove any remaining moisture.
Allow the chain to air dry for a few minutes to ensure it is completely dry before applying lubricant. Proper drying is crucial to prevent rust and ensure the lubricant adheres effectively to the chain.
Rinsing and drying the chain are essential steps in the cleaning process. They help remove any remaining degreaser and dirt, ensuring the chain is ready for lubrication.
Lubricating the Bike Chain
Choosing the Right Lubricant
Selecting the right lubricant is crucial for maintaining a clean and efficient bike chain. The type of lubricant you choose depends on the riding conditions and your personal preference. There are two main types of lubricants: wet lube and dry lube.
Wet lube is ideal for wet and muddy conditions. It is thicker and provides long-lasting lubrication, protecting the chain from moisture and dirt. However, wet lube can attract more dirt and grime, requiring more frequent cleaning.
Dry lube is suitable for dry and dusty conditions. It is lighter and doesn’t attract as much dirt, keeping the chain cleaner for longer periods. However, dry lube doesn’t last as long in wet conditions and may need more frequent reapplication.
Consider the riding conditions and terrain you typically ride on when choosing a lubricant. Having both types of lube on hand allows you to switch between them based on the weather and trail conditions.
Choosing the right lubricant ensures optimal performance and longevity of your bike chain. Proper lubrication reduces friction, prevents wear, and enhances the overall efficiency of the drivetrain.
Applying Lubricant
With the chain clean and dry, the next step is to apply lubricant. Proper lubrication ensures smooth and efficient operation of the chain, reducing friction and wear.
Start by applying the lubricant to the inside of the chain, focusing on each link and roller. Hold the lubricant bottle close to the chain to ensure accurate application. Rotate the pedals backward while applying the lubricant, covering the entire length of the chain.
Avoid over-lubricating the chain, as excess lube can attract dirt and grime. A single drop of lube on each link is sufficient to ensure thorough lubrication. If you notice excess lube dripping off the chain, you have applied too much.
After applying the lubricant, allow it to penetrate the chain for a few minutes. This period gives the lube time to reach all the moving parts and provide effective lubrication.
Once the lube has penetrated, use a clean rag to wipe off any excess lube from the outside of the chain. This step helps prevent dirt and grime from sticking to the chain, keeping it clean and efficient.
Proper application of lubricant ensures the chain operates smoothly and efficiently. This step enhances performance and reduces wear, prolonging the life of the chain and drivetrain components.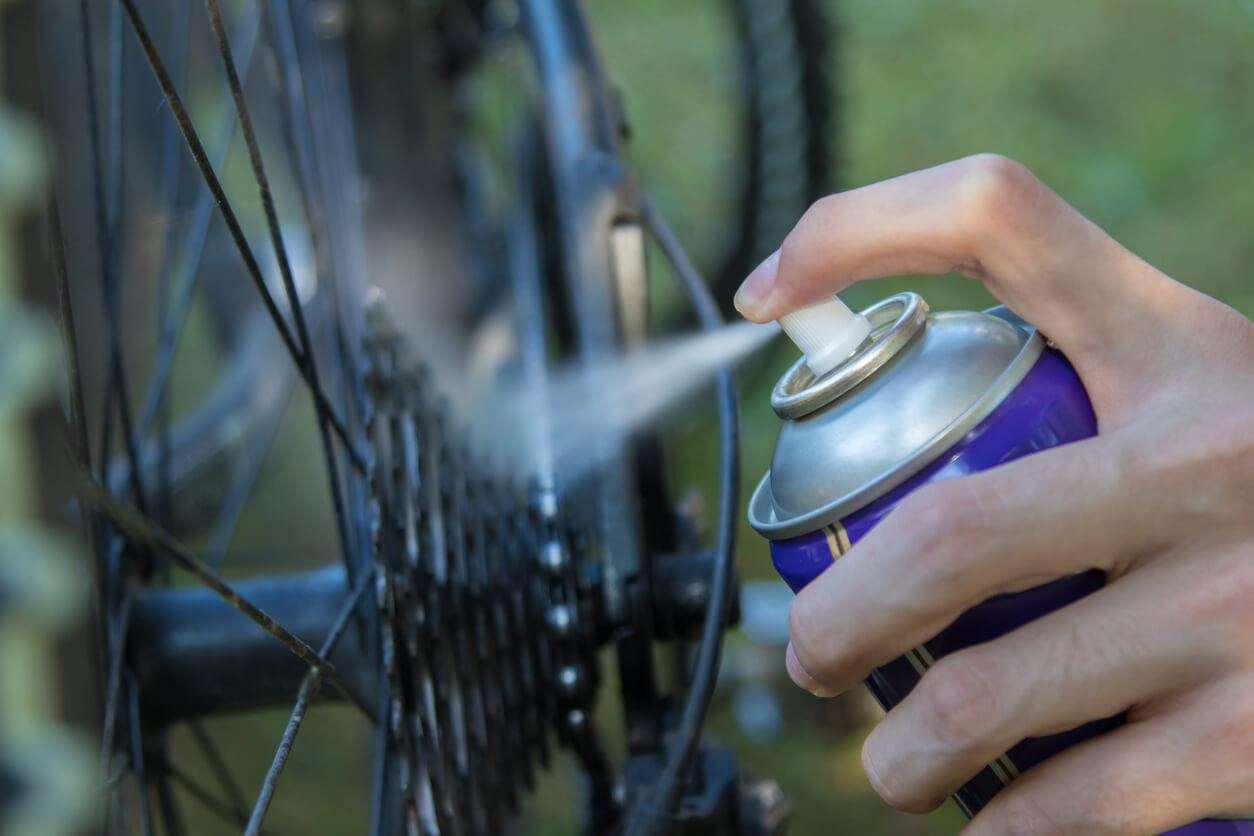
Post-Lubrication Tips
After applying lubricant, take a few additional steps to ensure optimal performance and longevity of your bike chain. First, consider riding the bike for a short distance to help distribute the lubricant evenly across the chain.
Regularly inspect the chain for signs of dirt, grime, and wear. Clean and lubricate the chain as needed to maintain optimal performance. Avoid using excessive force when shifting, as this can stress the chain and wear it out prematurely.
Store your bike in a clean, dry place to protect the chain from moisture and dirt. Cover the bike if storing it outdoors to prevent rust and corrosion.
By following these post-lubrication tips, you can ensure your bike chain remains clean and efficient. Regular maintenance and proper lubrication enhance performance and extend the lifespan of your bike’s drivetrain components.
Conclusion
Cleaning your bike chain is a crucial aspect of bike maintenance that ensures optimal performance and longevity. Regular cleaning and lubrication reduce friction, prevent wear, and enhance the overall efficiency of the drivetrain.
By understanding the importance of chain maintenance, gathering the necessary tools, and following a structured cleaning process, you can keep your bike chain in top condition. Proper lubrication further enhances performance and reduces wear, ensuring a smooth and enjoyable ride.
With this comprehensive guide, you now have the knowledge and techniques to clean and maintain your bike chain effectively. Regular maintenance ensures a reliable and efficient cycling experience, allowing you to focus on enjoying the ride.


